
Make Approval Path for Jira Processes Easier with Automation
Previously, Automation required technical expertise and the use of APIs. Based on the feedback of our customers, we have launched a new feature called ‘Automation’ in Approval Path for Jira , which enables us to skip semi-tech steps to set it up. With just a few clicks, we can save your time and reduce human errors by using Automation feature!
Automation step for Approval Path
Introducing new features of Automation
The newly added Automation step can be performed at the definition level, which means specific automation settings can be applied to any kind of project as long as rule applies to the project. Automation step has features listed below.
-
Change Issue Status
- It optimizes the time and effort spent manually clicking and changing the issue status. By selecting a status to be displayed on the Jira board after the approval process, the automation function will do this.
-
Change User Assigned to a Field
- Change a user as an assignee in a field so that automation will reassign it after the approval process.
-
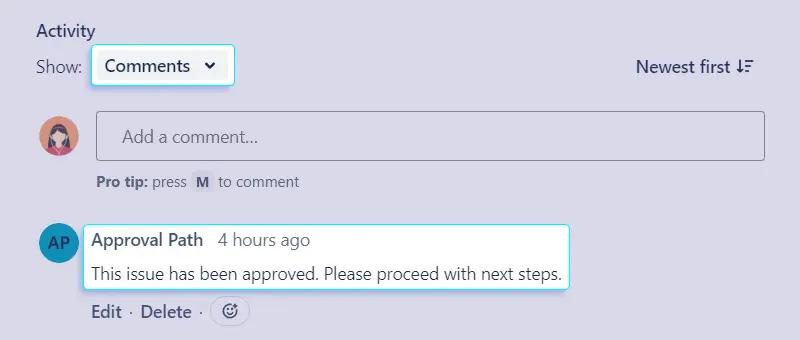
Add a Comment on Issue
- Use it as an indicator for related parties to better understand the Approval Path process.
-
Add/Remove Label(s)
- Effectively managing projects through labels to view and analyze issue better.
-
Set Entity Property
- Enables advanced reporting and filtering by using issue properties to generate detailed reports beyond Jira’s default fields.
Example Use Case
Scenario : Managing a Project with Approvals
JES Factory Project Manager manages a project with many issues. To streamline the process, he used Automation step to change the issue status to ‘Approved’ automatically after the approval process.
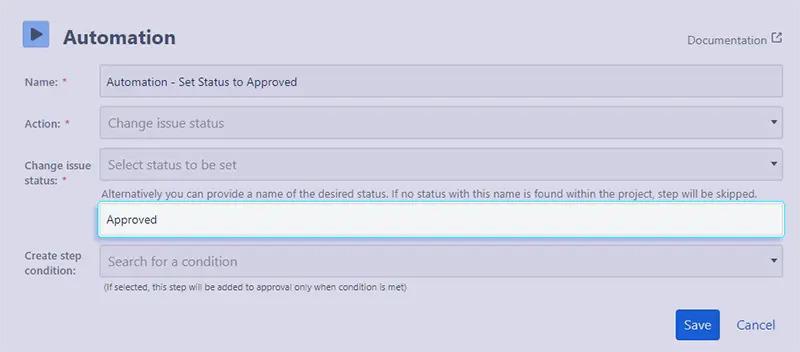
If a status name is found within the project, the step will be performed.
He also added a comment feature to inform all accessible users with ‘This issue has been approved. Please proceed with next steps.’
To manage and view issues with a clear indicator, he used automation to add labels ‘approved’ for approved issues and ‘rejected’ for rejected ones.
Months later, manager appreciated that he didn’t need to set up automation again for a new project. The Definition Level settings allowed him to reuse the same automation rules by simply applying the project name. Once he sets the rules same as before, this request will be applied to any project.
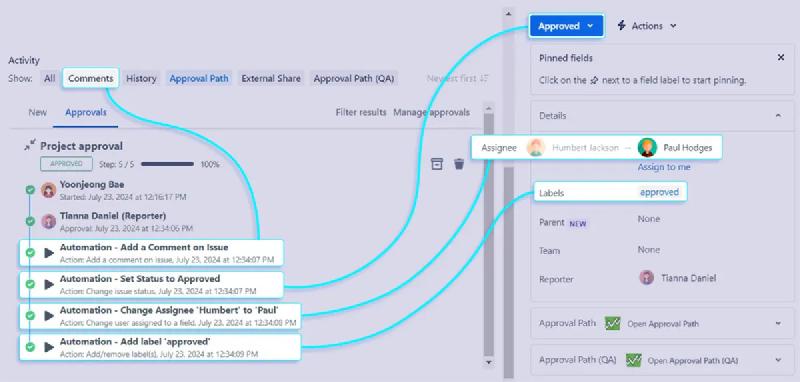
You can arrange the order in which the Automation function performs the actions.
You can check comments added through automation.
By using the Automation feature, you can maximize your work efficiency and customize the process to fit your needs. This feature provides four key benefits: efficiency, accuracy, consistency and flexibility.
Discover the benefits of our new Automation feature and make your Approval Path for Jira more seamless!
We’re dedicated to supporting your collaboration needs and your feedback - Connect with us on LinkedIn!
For more detailed information on Automation feature, please refer to our documentation available at Warsaw Dynamics documentation